I know you’re busy. You just need all the steps… like yesterday, so TLDR;
If you follow my steps, expect to achieve 95-100 points in a Google Page Speed score for a Mobile test run while spending no money.
Step 1
Some of you will be surprised to know that I build my blog posts in WordPress. Others of you peeked in the source and could tell from the html structure, so kudos to you.
While I build my site in WordPress, the hosted pages are not actually served from a full WordPress install backed by PHP + MySql. Nope, cause that’s not fast. Not hyper-fast anyway. You’ll never achieve a 100 GPS score with a setup like that.

I run a local install of WordPress hosted via WAMP on Windows. It’s made by those French guys. I recommend getting your installer and add-ons from here.

So I build my posts in a local site on my PC; sometimes they sit in draft for a bit. Sometimes they never leave draft status 😁.
Lately, I’ve been running a theme called Blocksy because it’s pretty lightweight, but I also love using Elementor, which will also work well. Of course there’s many techniques you’ll want to use in the production of your blogs to ensure top performance, but I’ll have to cover those in another post.
Step 2
Next I use a static site generating plugin to create a copy of my blog that does not require PHP or a database at all. Unfortunately, the free plugin I use, Static HTML Output, is no longer available, but the developer has created an alternate plugin called WP2Static. I have not used it, but you can check it out here.
The static site generator will crawl your site and copy the html, images, css and js files into a flattened structure. I recommend setting up a second local site that hosts the static site to check for errors. The flat html files will require no processing on the server, thus they get served up hyper-fast.
Step 3
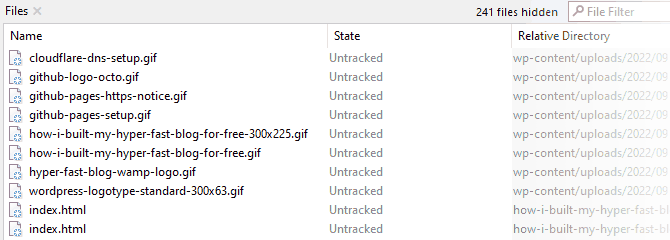
The next key to building this hyper-fast blog for free is to store those static website files in a GitHub repository. You’ll need to check in the changes generated each time a post is created, then push them as a commit into the production or release branch of your repository.

Step 4
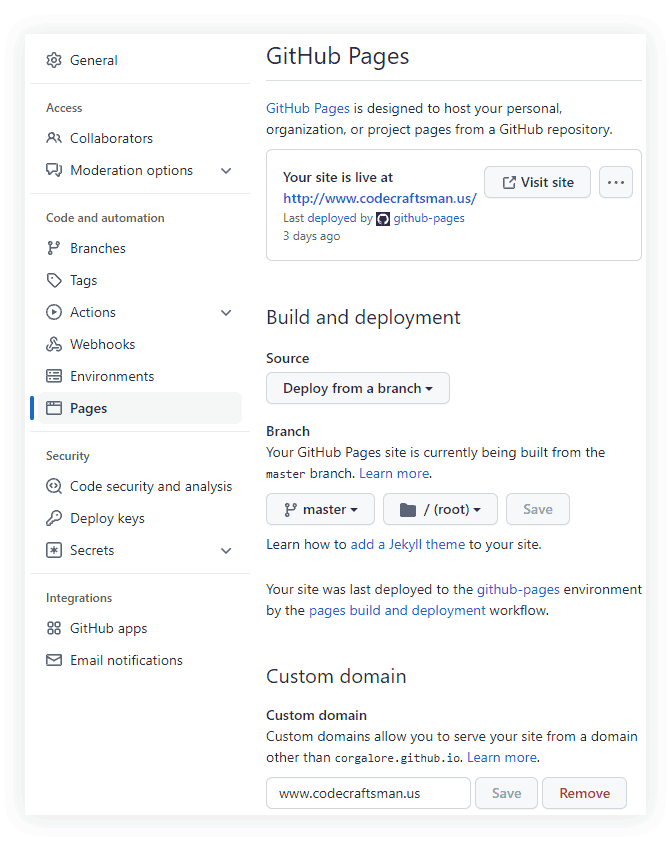
This is where things get interesting. GitHub has a great feature that allows you to host your source code files as a public website, called GitHub Pages. You need to access your repository home page then click on Settings > Pages. Here you can setup your source to Deploy from a branch into a github-pages Environment. If you need help setting this up, click here for a guide.

You can wait on setting up the custom domain until after the next step.
Step 5
Okay, we’re almost to the end. Hang in there.
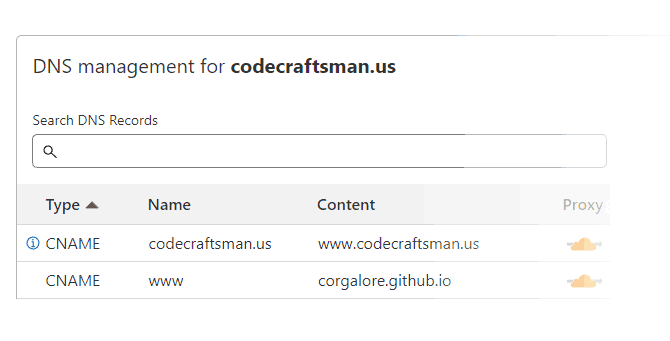
The last step is to create an account on the popular web proxy, Cloudflare. I know this requires pointing your domain name servers to Cloudflare. Some of you may not like this and I understand it can be annoying moving your DNS records. If you already have a web proxy that works for you, that’s fine too.

There’s plenty of switches you can flip in Cloudflare to further speed up your site, so explore a bit in the Speed > Optimization section.
Once you’ve gotten to this step you should go back to the GitHub Pages section and configure your custom domain name.
You might see a notice in GitHub Pages regarding HTTPS not being available. It will look something like this:

No worries, because SSL can be enabled and handled via the CloudFlare proxy for free.
At this point, as long as your DNS is resolved, GitHub will try validating your domain, but either way your site should be live. You should now be able to access your new blog and run a couple performance tests.
Summary
So, to recap, just do this to build a super-fast blog for no cost:
- Setup a local web server with an install of WordPress.
- Use a lightweight theme and build your posts as lean as possible.
- Use a static site generator to create a flattened copy of your site.
- Store your static site in a GitHub Repo.
- Setup a GitHub Pages site.
- Connect the Cloudflare proxy to your GitHub Pages site.
I wish you the best in your blog-venture!
P.S. If you need website analytics and you’re concerned with privacy, check out my blog post on Fathom.


