I’m going to assume you have already setup a Custom domain for your App Service. If not, from the sidebar of your App Service, select Settings > Custom domains and click Add custom domain from there.
To add your SAN certificate or Wildcard certificate into Azure, it must be a PFX file. I wrote a separate blog on creating a PFX file from your GoDaddy cert if you need help.
Uploading the certificate
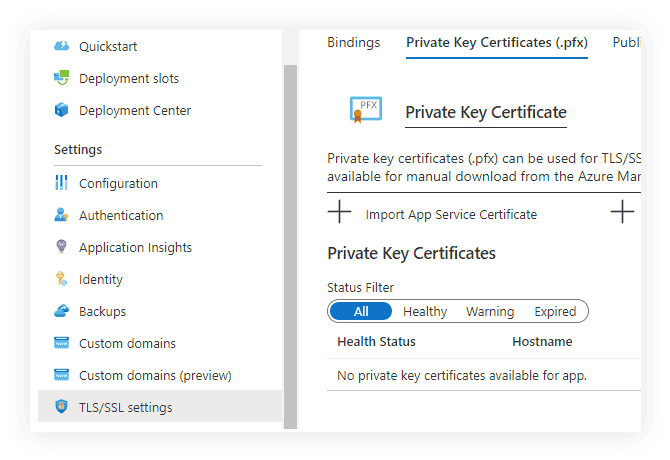
From the App Service blade, access Settings > TLS/SSL settings.
Select the tab named Private Key Certificates (.pfx). You will need a PFX file and its password.

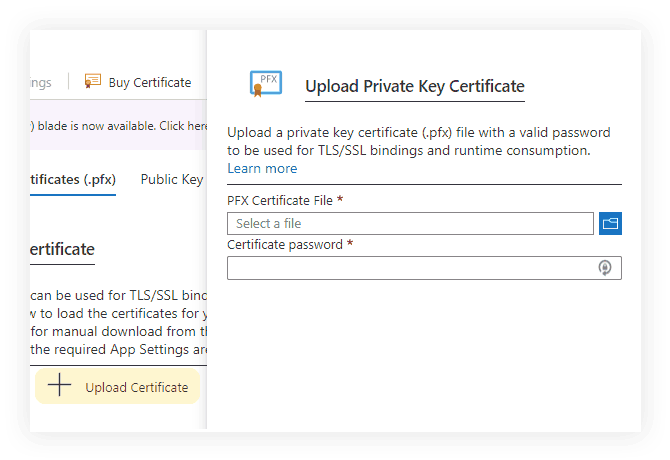
Click the option to Upload Certificate.

Browse for your PFX file, then fill in the certificate password.
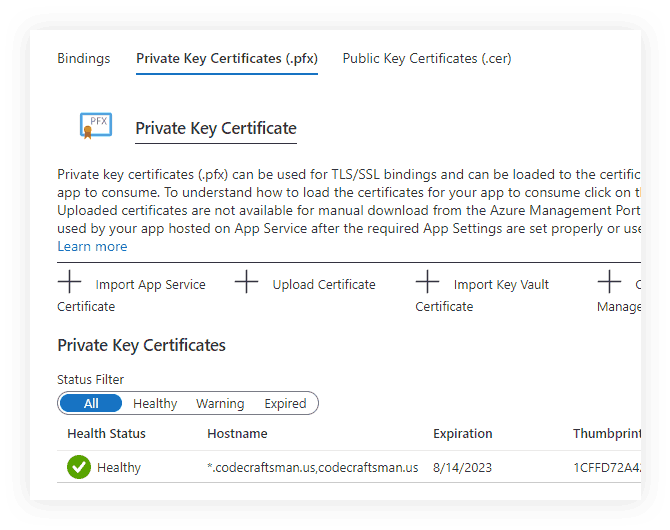
Assuming it passes validation, your certificate will now show up in the list of Private Key Certificates.

Assigning the certificate
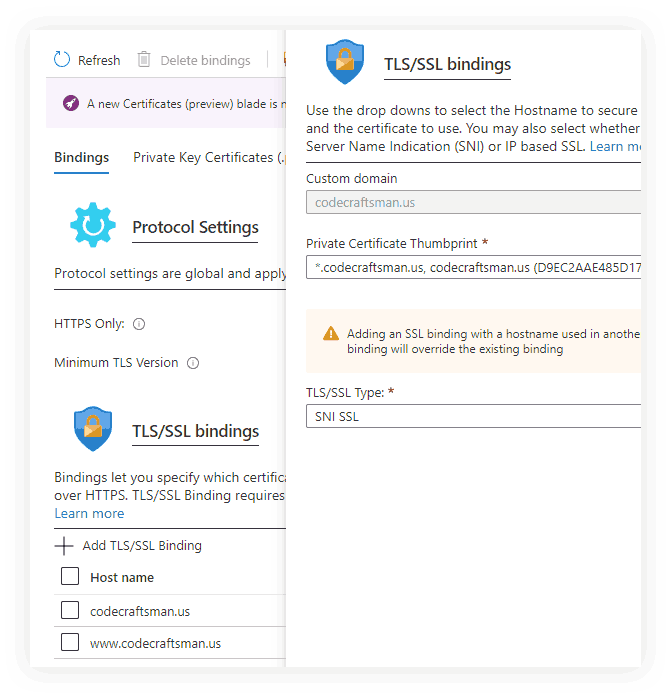
Now switch to the Bindings tab.
Under TLS/SSL bindings, click the Host name you intend to assign, which opens the binding fly-out panel.

From the Private Certificate Thumbprint dropdown, select the certificate you just uploaded. From the TLS/SSL Type dropdown choose SNI SSL unless you’ve purchased a dedicated IP address.
Click Add Binding and Azure will setup your SSL Binding. Do this for both root and www host names.
Your Azure App Service should now be secured with your custom 3rd-party cert.


